


【Docker项目】之--Freenom域名自动续签复活
#教程 #代理 #工具 #Docker #Docker-compose #域名 #Linux #Ubuntu
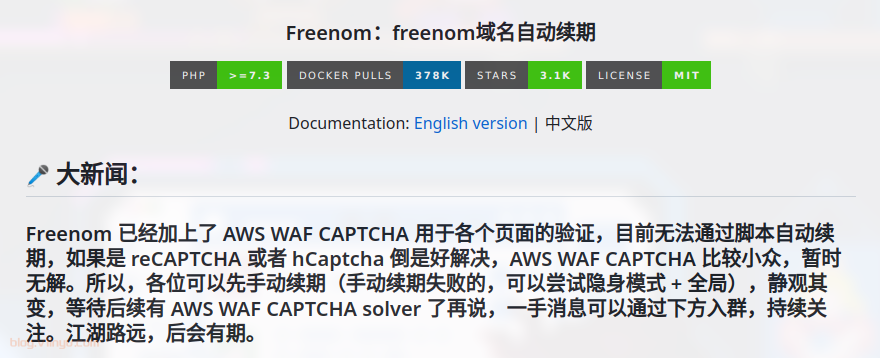
20231213自动续签复活!
v0.5.4
强制将重试次数改为 200 次
现在默认最大重试 200 次,基本 100% 成功。此版本没有追加新功能,会配置重试次数的用户可以不更新。v0.5.3
增加了重试机制,续期成功与否主要看缘分。
根据群友的反馈,重试机制可增加成功率。更多相关内容见群:https://t.me/freenom_auto_renew
由于各种云函数已经转为收费,目前不再发布云函数版本,其它版本不受影响。推荐在 vps 使用 docker 搭建,没有 vps 的小伙伴可以通过下面途径购买,含 aff:https://go.llfapp.com/cc
20230603自动续签已经失效!!!以下是作者在GitHub的通知。
Freenom提供免费顶级域名,免费时间最长可选择一年,距离到期14日内可继续选择续期,如果错过续签时间,就无法再免费使用该域名。下面这个项目可以发送续期通知,实现自动续签功能。
Freenom:https://www.freenom.com
GitHub:https://github.com/luolongfei/freenom
Docker Hub:https://hub.docker.com/r/luolongfei/freenom
1. 安装准备
系统:ubuntu 20.4
工具:docker和docker-compose
2. 搭建
2.1. 创建数据存放位置
mkdir -p /data/docker_data/freenom   ## 创建文件夹

cd /data/docker_data/freenom   ## 进入文件夹
下面两种方式任选一种
2.2. docker直接安装
docker run -d --name freenom --restart always -v /data/docker_data/freenom:/conf -v /data/docker_data/freenom/logs:/app/logs luolongfei/freenom
2.3. docker-compose方式
2.3.1. 编辑docker-compose.yml
vim docker-compose.yml ## 创建docker-compose
version: '3'
services:
    freenom:
        image: luolongfei/freenom:latest
        container_name: freenom
        restart: always
        volumes:
            - '/data/docker_data/freenom:/conf'
            - '/data/docker_data/freenom/logs:/app/logs'
2.3.2. 拉去镜像开始安装
docker-compose up -d
2.4. 配置环境变量
编辑/data/docker_data/freenom下的配置文件.env
#####################################################################
# 注意事项
#
# - 环境变量的格式为“键=值”,顶格写,注意等号两边不能有空格,值可以用单引号或者双引号引起来,不引也行(下面的特殊情况必须引起来)
# - 因为环境变量中“#”代表注释,若密码中存在“#”字符的,一定要使用单引号将整个密码引起来,否则解析会在“#”字符前截止,如果密码中存在单双引号的,
#    需要在单双引号前加“\”转义
# - 配置多账户不可省略单引号,且多个账户和密码的格式必须是“<账户1>@<密码1>|<账户2>@<密码2>|<账户3>@<密码3>”,不要有空格,就算有程序也会给你干掉
#    e.g. MULTIPLE_ACCOUNTS='<账户1>@<密码1>|<账户2>@<密码2>|<账户3>@<密码3>'
#    注意不要省略“<>”符号,否则无法正确匹配
# - 若你只有单个账户,只配置 FREENOM_USERNAME 和FREENOM_PASSWORD 就够了
# - 单账户和多账户的配置会被合并在一起读取并去重
#####################################################################

# .env 文件版本
ENV_FILE_VERSION='v2.6'

######################  账户配置 Account config  #########################
# Freenom 账户 Freenom Account
FREENOM_USERNAME=''

# Freenom 密码 Freenom password
FREENOM_PASSWORD=''

# 多账户支持 Support for multiple accounts
MULTIPLE_ACCOUNTS=''

# 【可选】 Freenom 代理 [Optional] Freenom proxy e.g. http://127.0.0.1:1081 or socks5://127.0.0.1:1080
FREENOM_PROXY=''
######################  end 账户配置  #########################

######################  通知邮件配置 Email config  #########################
# 机器人邮箱账户 Email of robot
MAIL_USERNAME=''

# 机器人邮箱密码(Gmail 填应用专用密码,QQ 邮箱或 163 邮箱填授权码) Password of the robot email
MAIL_PASSWORD=''

# 用于接收通知的邮箱 Email address used to receive notifications
TO=''

# 是否启用邮件推送功能 1:启用 0:不启用 Whether to enable email push features 1: enabled 0: not enabled
MAIL_ENABLE=0

# 【可选】 自定义邮箱配置 [Optional] Custom email config
# 如果你想使用除“QQ邮箱、163邮箱、Gmail、Outlook邮箱”以外的邮箱或者自建邮箱服务作为机器人邮箱,可以自定义邮箱配置,否则请不要配置这些项
# If you want to use mailboxes other than "QQ mailbox, 163 mailbox, Gmail, Outlook mailbox" or self-built mailbox service as robot mailbox, you can customize mailbox configuration, otherwise, please don't configure these items.

# 【可选】 SMTP 服务器 [Optional] SMTP server e.g. smtp.gmail.com
MAIL_HOST=''

# 【可选】 SMTP 端口号,一般是 587 或者 465 [Optional] SMTP port number, usually 587 or 465
MAIL_PORT=''

# 【可选】 邮件加密方式,一般是 tls 或者 ssl 或者 starttls [Optional] Mail encryption method, usually tls or ssl or starttls
MAIL_ENCRYPTION=''

# end 自定义邮箱配置 end of custom email config

######################  end 通知邮件配置  #########################

######################  Telegram bot  #########################
# 通过 Telegram bot 发送通知消息 Send messages via Telegram bot

# 你的 chat_id,通过发送“/start”给 @userinfobot 可以获取自己的 id Your chat_id, you can get your own id by sending "/start" to @userinfobot
TELEGRAM_CHAT_ID=''

# 你的 Telegram bot 的 token Token for your Telegram bot
TELEGRAM_BOT_TOKEN=''

# 【可选】 Telegram 代理 [Optional] Telegram proxy e.g. http://127.0.0.1:1081 or socks5://127.0.0.1:1080
TELEGRAM_PROXY=''

# 【可选】 自建 Telegram 反向代理地址,不明白则请忽略此配置项,保持默认即可 [Optional] Please do not modify this item
# 参考:https://web.archive.org/web/20220221035315/https://hostloc.com/thread-805441-1-1.html
# 只要是一个合法的网址即可,程式会自动提取网址的主机部分。例如 https://xxx.xx.workers.dev/ or xxx.xx.xx
CUSTOM_TELEGRAM_HOST='api.telegram.org'

# 是否启用 Telegram Bot 功能 1:启用 0:不启用 Whether to enable Telegram Bot features 1: enabled 0: not enabled
TELEGRAM_BOT_ENABLE=0
######################  end Telegram bot  #########################

######################  企业微信  #########################
# 企业 ID Corporate ID
WECHAT_CORP_ID=''

# 应用的凭证密钥 Credential keys for enterprise WeChat applications
WECHAT_CORP_SECRET=''

# 应用 ID
WECHAT_AGENT_ID=''

# 是否启用企业微信送信功能 1:启用 0:不启用 Whether to enable the enterprise WeChat message push function 1: Enable 0: Do not enable
WECHAT_ENABLE=0
######################  end 企业微信  #########################

######################  Server 酱  #########################
# Server 酱的 SendKey
SCT_SEND_KEY=''

# 是否启用 Server 酱 送信功能 1:启用 0:不启用 Whether to enable the ServerChan message function 1: enabled 0: not enabled
SCT_ENABLE=0
######################  end Server 酱  #########################

######################  Bark 送信  #########################
# Bark key 打开 Bark App,注册设备后看到的 key Open the Bark App, register the device and see the key
# 支持直接粘贴 “https://api.day.app/xxx/这里改成你自己的推送内容” 这类文本,程序会自动从中提取有效的 Bark key Support direct paste "https://api.day.app/xxx/这里改成你自己的推送内容" type of text, the program will automatically extract the valid Bark key from it
BARK_KEY=''

# Bark 域名 默认是 Bark 作者提供的服务,建议自建 The Bark URL defaults to the server provided by the Bark author, and it is recommended to build your own
BARK_URL='https://api.day.app'

# Bark 其它相关参数(保持默认即可)
BARK_IS_ARCHIVE=''
BARK_GROUP='FreeNom'
BARK_LEVEL='active'
BARK_ICON='https://q2.qlogo.cn/headimg_dl?dst_uin=593198779&spec=100'
BARK_JUMP_URL=''
BARK_SOUND='gotosleep'

# 是否启用 Bark 推送消息 1:启用 0:不启用 Whether to enable Bark push messaging 1: Enable 0: Do not enable
BARK_ENABLE=0
######################  end Bark 送信  #########################

######################  Pushplus  #########################
# Pushplus的 token
PUSHPLUS_KEY=''

# 是否启用 Pushplus 送信功能 1:启用 0:不启用 Whether to enable the Pushplus message function 1: enabled 0: not enabled
PUSHPLUS_ENABLE=0
######################  end Pushplus  #########################

# 通知频率 0:仅当有续期操作的时候 1:每次执行 Notification frequency 0: Only when there is a renewal operation 1: Each execution
NOTICE_FREQ=1

# 是否验证服务器证书 1:验证 0:不验证 Whether to verify the server certificate 1: verify 0: no verification
VERIFY_SSL=0

# 是否开启 Debug 模式 1:开启 0:关闭 Whether to turn on Debug mode 1: On 0: Off
DEBUG=0

# 检测是否有新版本可用,发现新版本时推送消息通知 1:开启 0:关闭 Automatically detects if a new version is available and pushes a message notification when a new version is found 1: On 0: Off
NEW_VERSION_DETECTION=1

# 应用语言配置 Application language configuration, the supported values are zh or en, zh means Chinese, en means English
CUSTOM_LANGUAGE=zh

# 送信时是否显示服务器信息 1:显示 0:不显示 Whether to display server information when sending messages 1: Display 0: Do not display
SHOW_SERVER_INFO=0

# 是否给敏感信息打码 1:启用 0:不启用 Whether to enable the obfuscation of sensitive information 1: Enabled 0: Not enabled
MOSAIC_SENSITIVE_INFO=0
账户配置 Account config填写好后,下面的通知方式根据需要选择(不知道怎么获取参数)。修改完毕保存,重新启动容器。
docker restart freenom
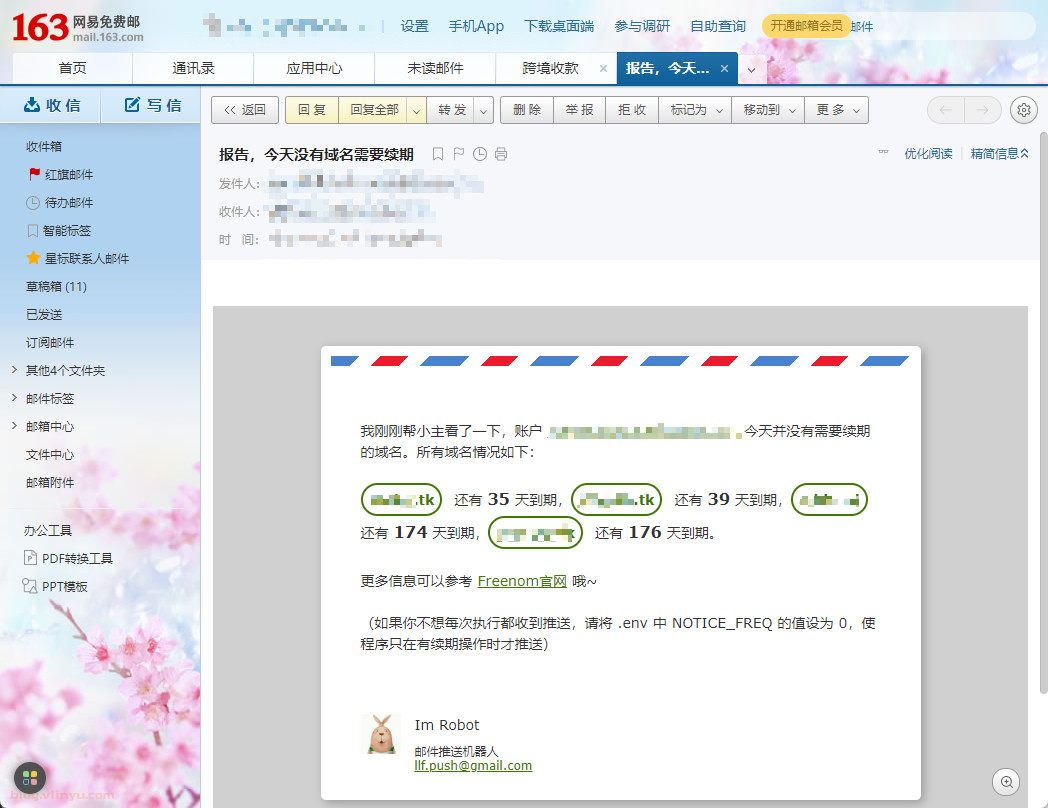
3. 使用及展示
配置正确,重启容器后就会接到通知了。
- 邮箱通知方式
- TG通知方式

评论区